In the realm of network security, the acronym ASA signifies the Adaptive Security Appliance, an essential operating system underpinning the Cisco ASA product family. This OS empowers Cisco ASA devices with robust enterprise-level firewall capabilities. Nevertheless, when harnessing the power of GNS3, a network simulation platform, one must bear in mind that it may not replicate all the features of a physical Cisco ASA device. Nevertheless, it’s an invaluable tool for practicing and self-studying.
Adding Cisco ASA to GNS3
To embark on the journey of incorporating Cisco ASA into your GNS3 environment, follow these meticulously outlined steps:
Step 1: Download ASA Image Files
Begin by acquiring the ASA image files and extracting them into a dedicated folder, such as ‘E:\GNS3\ASA.’ After extraction, you should have three distinct files at your disposal.
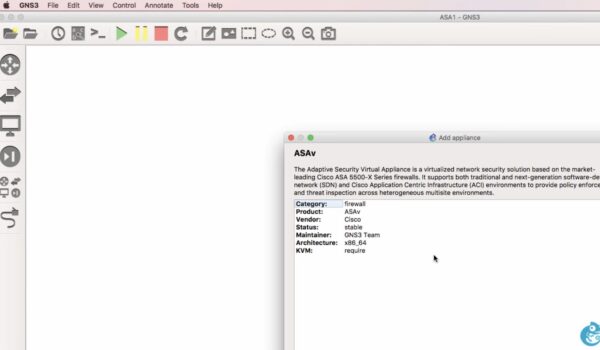
Step 2: Obtain the Cisco ASA Image
Download the Cisco ASA image file, acknowledging the source (Credit: Mediafire).
Step 3: Configure QEMU VM
Within the GNS3 console, navigate to ‘Preferences,’ select ‘Qemu VMs,’ and initiate the creation of a new QEMU VM template.
Step 4: Specify VM Type
In the ‘New QEMU VM template’ window, designate the Type as ‘ASA’ from the dropdown menu and proceed to the next step.
Step 5: Name the VM
Provide a name for your QEMU VM and move on to the subsequent configuration step.
Step 6: Configure Memory
Customize the memory size to your preferences or adhere to the default memory size and proceed to the next step.
Step 7: Set Up Disk Image
In the ‘Disk Image’ section, either select an existing image or choose the ‘New Image’ option to create a new one. Label it as ‘ASAImage’ in the text box and complete the image creation process.
Step 8: Image Format Selection
Select the appropriate image format (e.g., Qcow2) and navigate through the Qcow2 options before confirming your choice.
Step 9: Define Storage Location
Specify the location for storing the disk image or stick with the default location, and then proceed to the next step.
Step 10: Configure ASA VM
Select the ‘New Image’ option for the ASA VM. Add the initial RAM disk file by clicking ‘Browse’ and selecting the extracted initial file. Confirm the action by clicking ‘Yes.’ Repeat the process for the Kernel image file, selecting the vmlinuz file. Once again, affirm with a ‘Yes’ click and then finalize the setup.
Step 11: Node Properties Configuration
Open the Node properties window by clicking ‘Edit.’ In the ‘General settings’ tab, set the Memory size to 2048 MB to prevent potential RAM-related errors. Navigate to the ‘Network’ tab and enable the ‘Use the legacy network mode’ option to avoid network issues. Finally, in the ‘Advanced settings’ tab, configure the Kernel command line and additional options as specified.
Step 12: Activate ASA VM
Close the Node properties window and add the Cisco ASA to your workspace. Right-click on ASA-1, select ‘Start’ to commence the operation and open the ASA console.
Accessing the Cisco ASA Console
Patience is key as you wait for the file decompression process to complete, which may take up to half an hour. Once uncompressed, the ASA console prompt will appear, indicating a successful integration.
You’ve now triumphantly integrated Cisco ASA into your GNS3 environment. We hope you found this guide helpful. Feel free to show your support by liking and sharing this post, as it motivates us to continue providing informative articles.
Conclusion
In the ever-evolving landscape of network security and hands-on learning, the process of integrating Cisco ASA into GNS3 represents a significant step towards honing one’s skills. This step-by-step guide has illuminated the path, ensuring that even those with a basic understanding of GNS3 can navigate it with ease.
By understanding the fundamentals of the Adaptive Security Appliance (ASA) and harnessing the capabilities of GNS3, individuals can embark on a journey of practical exploration and experimentation. This fusion of technology empowers aspiring network professionals and security enthusiasts to gain valuable insights into firewall operations without the need for physical hardware.