In the ever-evolving world of cloud computing, managing costs is a top priority for businesses utilizing Amazon Web Services (AWS). One effective way to reduce AWS expenses is by automating the start and stop times of EC2 instances using AWS Lambda functions. In this comprehensive guide, we’ll delve into the concept of auto start/stop EC2 instances and provide a step-by-step tutorial on how to implement this cost-saving strategy using AWS Lambda.
1. The Need for Automation
In the rapidly evolving realm of cloud computing, automation is now a vital necessity. Leveraging tools like Auto Start/Stop scheduling for EC2 instances and AWS Lambda, organizations can streamline operations, reduce costs, and optimize resource utilization. Automation ensures that instances are active precisely when needed and idle ones are shut down automatically. Lambda, with its event-driven capabilities, further enhances efficiency by executing code based on specific triggers or conditions. As businesses pursue agility and cost-effectiveness in the cloud, solutions like EC2 Instances Scheduling and Schedule Lambda have become indispensable components of their strategies.
The Challenge of Cost Management
The Challenge of Cost Management in the realm of Amazon Web Services (AWS) is a multifaceted issue that revolves around the dynamic and flexible environment provided by Elastic Compute Cloud (EC2) instances. AWS’s EC2 instances empower businesses with remarkable flexibility and scalability in hosting virtual servers. Nevertheless, this very flexibility, which is often a blessing, can sometimes transform into a challenge in the form of inefficiencies in resource utilization and elevated costs. Navigating the labyrinthine landscape of EC2 instances to optimize cost-efficiency is a formidable undertaking, especially within intricate and sprawling infrastructures. The intricacies of manually managing EC2 instance states to minimize costs can seem like an insurmountable task, demanding a nuanced and well-thought-out approach to harness the full potential of AWS while keeping expenditures in check.
Enter Auto Start/Stop Scheduling
Auto start/stop scheduling is a solution that automatically starts EC2 instances when needed and stops them during periods of inactivity. This approach not only reduces operational expenses but also ensures optimal resource utilization. Let’s explore why this automation is essential for cost-conscious AWS users.
2. Leveraging AWS Lambda
In the realm of serverless computing, AWS Lambda stands out as a powerful and versatile tool. AWS Lambda enables developers to run code without the need to manage servers, making it an ideal choice for a wide range of applications and tasks. Leveraging AWS Lambda can bring transformative benefits to an organization’s cloud infrastructure. With Lambda, developers can build event-driven applications, automate workflows, and execute code in response to various triggers, all while paying only for the compute time consumed during execution. This serverless approach not only streamlines development processes but also enhances scalability and cost-efficiency. By utilizing AWS Lambda effectively, businesses can focus on building innovative solutions without the distractions of server management, ultimately accelerating the pace of innovation in the ever-evolving landscape of cloud computing.
Understanding AWS Lambda
AWS Lambda is a serverless computing service that allows you to run code without provisioning or managing servers. It responds to events generated by other AWS services, making it a perfect candidate for automating EC2 instance schedules.
Benefits of AWS Lambda
- Cost-Efficiency: One of the most significant advantages of using Lambda is cost-efficiency. Lambda only charges for the compute time used, making it a cost-effective choice for automating EC2 instances. Traditional server-based solutions would require you to pay for dedicated server resources, regardless of their utilization;
- Scalability: Lambda is inherently scalable. It automatically scales to handle varying workloads, ensuring that your EC2 instance scheduling tasks can adapt to changes in demand without manual intervention;
- Integration: Lambda seamlessly integrates with other AWS services and resources. This means you can easily trigger Lambda functions based on events from services like CloudWatch, making it ideal for automating EC2 instance schedules based on specific conditions.
3. Setting Up Auto Start/Stop Scheduling

Prerequisites
Before you can start automating your EC2 instances with Lambda, you’ll need the following:
- An AWS account;
- EC2 instances to manage;
- An AWS Lambda function.
Creating Lambda Functions
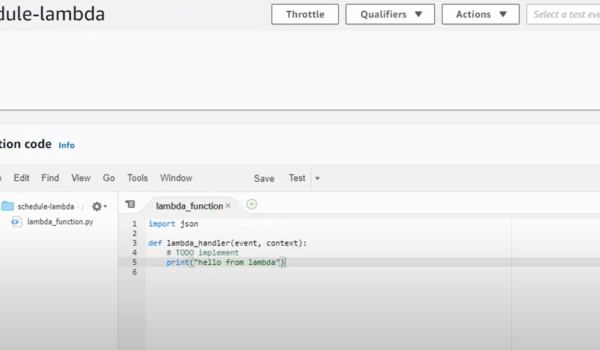
- Define the Function: Write the Lambda function code to start and stop EC2 instances based on a schedule. We’ll walk you through the code required to accomplish this task effectively;
- Create a Trigger: Set up a trigger for the Lambda function. One common choice is using CloudWatch Events to initiate scheduled execution. We’ll explain how to configure this trigger and define your desired schedule.
Configuring IAM Roles
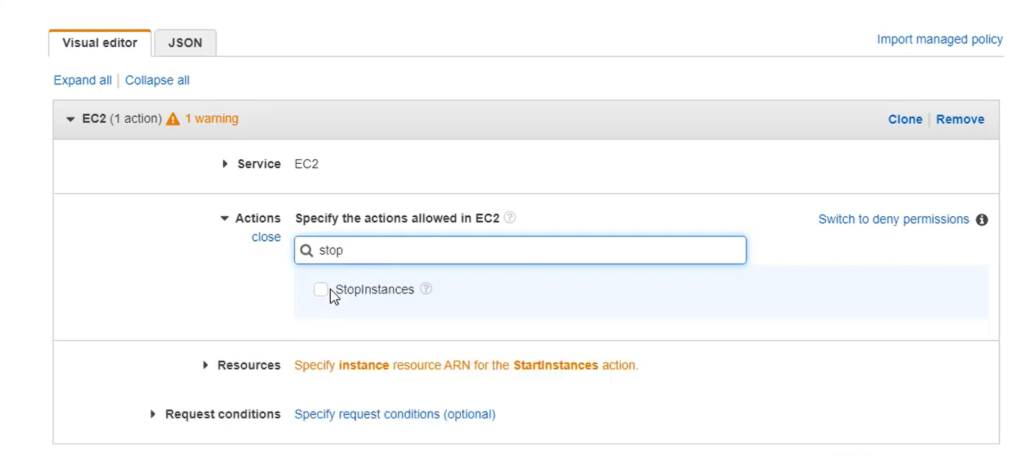
To interact with EC2 instances, your Lambda function must have the necessary permissions. We’ll guide you through the process of creating an IAM role with the required policies to ensure your Lambda function can start and stop EC2 instances securely.
Testing and Deployment
Before deploying your Lambda function in a production environment, it’s essential to test it thoroughly. We’ll provide best practices for testing Lambda functions to ensure they work as expected. Once satisfied, we’ll guide you through the deployment process.
4. Monitoring and Fine-Tuning
| Aspect | Description |
|---|---|
| Monitoring and Logs | After implementing auto start/stop scheduling with Lambda, monitoring its performance is critical. Utilize AWS tools such as CloudWatch Logs and Metrics to gain insights into your Lambda function’s execution and the status of your EC2 instances. Setting up monitoring and actionable alerts is essential to maintaining operational efficiency and cost control. |
| Fine-Tuning the Schedule | Achieving long-term success with auto start/stop scheduling necessitates periodic review and adjustment of your scheduling strategy. This practice ensures that your scheduling aligns with changing business requirements and usage patterns. We will explore best practices for fine-tuning your schedule iteratively, ensuring the continued effectiveness of your AWS cost optimization endeavors. |
Section 5: Benefits
Implementing auto start/stop scheduling for EC2 instances with Lambda offers numerous benefits, including:
- Significant cost savings: By only running instances when needed, you can reduce your AWS expenses substantially;
- Improved resource utilization: Lambda-driven automation ensures that your resources are active only when necessary, optimizing your infrastructure’s efficiency;
- Reduced operational overhead: Manually managing EC2 instances can be time-consuming and prone to errors. Automation simplifies this process;
- Scalability and flexibility: Lambda’s scalability ensures that your scheduling tasks can adapt to changes in workload without manual intervention.
Packet Tracer OSPF Setup

Configuring OSPF (Open Shortest Path First) in Packet Tracer is a fundamental skill for network engineers. OSPF is a widely used routing protocol that helps routers exchange routing information and make informed decisions about the best path to reach destinations within an IP network. Here’s a step-by-step guide to configuring OSPF in Packet Tracer:
Prerequisites:
- Packet Tracer installed on your computer;
- A basic network topology with at least two routers.
Step 1: Open Packet Tracer and Create Your Topology
- Launch Packet Tracer;
- Create a network topology by adding routers and connecting them with appropriate interfaces. Ensure that all routers you want to include in the OSPF process are connected.
Step 2: Access Router Command-Line Interface (CLI)
- Double-click on a router to open its CLI (Command-Line Interface) window.
Step 3: Configure Router Interfaces
- In the router’s CLI, configure the IP addresses and subnet masks on each interface that will participate in OSPF. Use the following commands for each interface:
enable
configure terminal
interface <interface_type> <interface_number>
ip address <ip_address> <subnet_mask>
no shutdown
exit
For example:
enable
configure terminal
interface GigabitEthernet0/0
ip address 192.168.1.1 255.255.255.0
no shutdown
exit
Repeat this step for all interfaces you want to include in OSPF.
Step 4: Enable OSPF
In the router’s CLI, enable OSPF on the router by using the following commands:
configure terminal
router ospf <process_id>
For example:
configure terminal
router ospf 1
Repeat this step for each network you want to include in OSPF.
Step 6: Verify OSPF Configuration
To verify your OSPF configuration, use the following command:
show ip ospf neighbor
This command will display a list of OSPF neighbors if the configuration is successful.
Step 7: Save Configuration
Don’t forget to save your configuration changes. Use the following command:
write memory
Step 8: Repeat for Other Routers
Repeat Steps 2-7 for other routers in your network.
Step 9: Test Your OSPF Configuration
Ensure that your routers can ping each other’s interfaces. This will confirm that OSPF is working correctly and has established neighbor relationships.
That’s it! You’ve successfully configured OSPF in Packet Tracer. OSPF will now dynamically update routing tables and allow routers to find the shortest path to reach their destinations within the OSPF area. Remember that OSPF requires consistent configuration across all routers in the area to function correctly.
Conclusion
Automating the start and stop times of your AWS EC2 instances using AWS Lambda is a powerful cost optimization strategy. By doing so, you can achieve substantial cost savings, enhance resource management, and ensure that your AWS infrastructure operates efficiently. Implementing this solution is a step towards harnessing the full potential of AWS while keeping your costs in check. Start your journey towards smarter cost management today!
