In the realm of server operating systems, Red Hat Enterprise Linux 7 emerges as the latest incarnation within the RHEL server family. It brings forth a multitude of novel features and enhancements when compared to its predecessor, RHEL 6. In the contemporary landscape, RHEL 7 demonstrates heightened compatibility with Cloud and Virtualization technologies.
Within the confines of this narrative, a meticulous step-by-step guide unravels, elucidating the process of installing RHEL 7 on either VMware Workstation or VMware Player. This endeavor necessitates the utilization of an ISO image file as the primary installation source. For those seeking the ISO image, a visit to the official Red Hat website offers an evaluation version for download. Alternatively, one may opt for CentOS 7 as a substitute for RHEL 7 in pursuit of the same objective. Remarkably, the installation procedure remains consistent across various platforms, including physical systems, VirulaBox, and the Hyper-V platform.
To embark on the journey of installing RHEL 7 on VMware, the following sequence of actions must be meticulously executed:
Step 1: Initializing the Installation
Launch the console of VMware Workstation or Player and initiate the process by selecting “Create a New Virtual Machine.” Opt for the “Installer disc image file (iso)” radio button as the installation source. Then, proceed to select the RHEL 7 ISO image file.
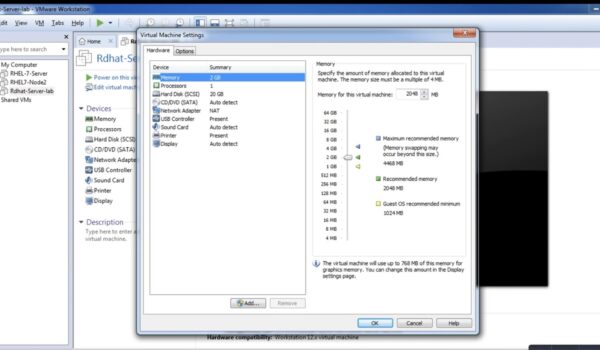
Step 2: Configuring Virtual Machine Settings
Progress to the next stage by clicking “Next.” Here, designate the guest operating system as Linux and specify RHEL 7 as the version. In the event that RHEL 7 isn’t available in the version drop-down list, opt for RHEL 6 (64-bit) and continue.
Step 3: Virtual Machine Details
On the subsequent page titled “Name and Virtual Machine,” define a name and location for the virtual machine. Afterward, click “Next”.
Step 4: Disk Capacity Setup
In the “Specify Disk Capacity” section, allocate the desired disk size (approximately 20 GB for testing purposes). Ensure that the “Store virtual disk as a single file” option is selected before proceeding. Then, click “Next”.
Step 5: Finalizing Virtual Machine Creation
Reach the “Ready to Create Virtual Machine” page and conclude this phase by clicking “Finish.” Subsequently, power on the newly created virtual machine.
Step 6: Commencing Installation
Upon boot options, opt for “Install Red Hat Enterprise Linux 7.0” and press Enter. When prompted, press Enter once more to commence the installation process.
Step 7: Guided Installation
Navigate through the Welcome page by selecting the desired language and clicking “Continue.” On the “Installation Summary” page, focus on “SOFTWARE SELECTION” and select the “Server with GUI” option. Notably, the default package selection excludes GUI components, necessitating manual selection to access the graphical user interface.
Step 8: Disk Configuration
Shift attention to “INSTALLATION DESTINATION.” On the “Device Selection” screen, embrace the “Automatically configure partitioning” option and affirm your choice by clicking “Done.” If you possess expertise in Linux disk partitioning, feel free to craft custom partitions; otherwise, accepting the default settings is advisable.
Step 9: Installation Commencement
With the groundwork set, advance to the “Begin Installation” stage. During the configuration phase, establish the desired root password. Optionally, you can generate additional user accounts if needed. The installation process commences, and patience is essential as it may require 15-20 minutes to conclude.
Step 10: Post-Installation Procedures
Following installation completion, initiate a reboot of the virtual machine. Be prepared to acknowledge license terms and finalize the installation. You may also be prompted to configure Kdump memory and subscription management. After the system reboot, follow on-screen instructions to configure fundamental settings such as keyboard language and time zone.
Step 11: Accessing Your RHEL 7 Server
On the Login screen, access the system by logging in with the root user credentials, and you’re now at the helm of your very own RHEL 7 server.
In conclusion
With these steps meticulously executed, the installation of RHEL 7 on VMware Workstation is a journey successfully undertaken. This comprehensive guide aims to assist you on your quest, and we eagerly await your continued engagement for forthcoming articles.