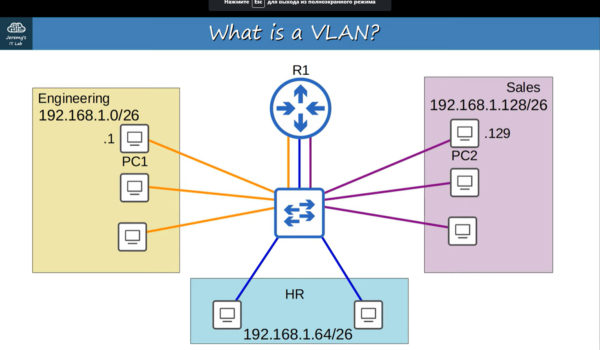
Configuring VLANs (Virtual Local Area Networks) on Cisco switches is a fundamental skill for network administrators. In this comprehensive guide, we will take you through the process step by step, ensuring that even beginners can follow along. By the end of this article, you’ll be proficient in setting up VLANs on Cisco switches, enhancing network segmentation and security.
Understanding VLANs
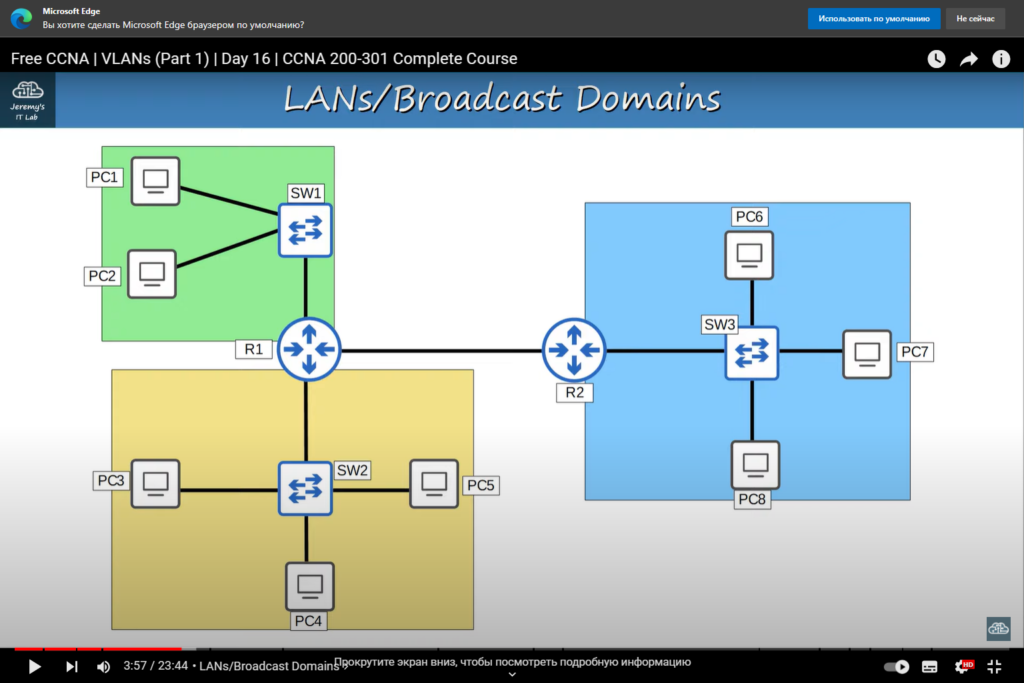
Before diving into the configuration, it’s essential to grasp the concept of VLANs. VLANs allow you to segment a physical network into multiple logical networks, each operating independently. This segmentation helps improve network efficiency, security, and management.
Prerequisites
To get started, you’ll need the following:
- A Cisco switch (we recommend the Cisco Catalyst series);
- Access to the switch’s command-line interface (CLI);
- Administrator-level access.
Step 1: Access the Cisco Switch
The first step is to access the Cisco switch’s CLI. Connect to the switch using a console cable or via SSH if it’s already configured. Once connected, log in with your administrator credentials.
Step 2: Enter Privileged EXEC Mode
To make configuration changes, you need to enter privileged EXEC mode. Type the following command and enter your password when prompted:
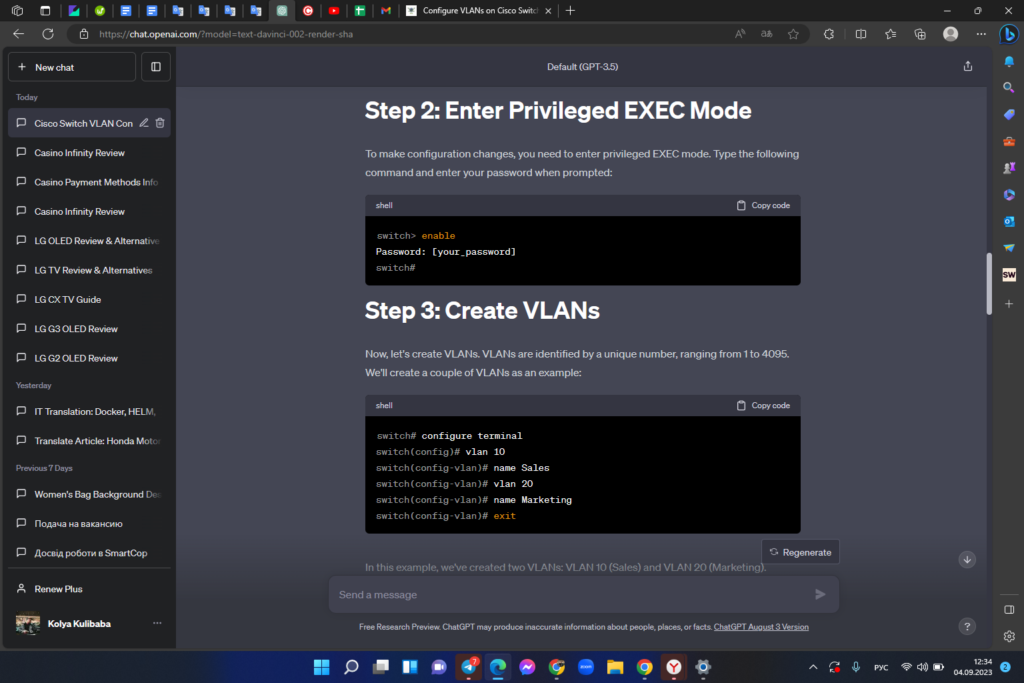
Step 3: Create VLANs
Now, let’s create VLANs. VLANs are identified by a unique number, ranging from 1 to 4095. We’ll create a couple of VLANs as an example:
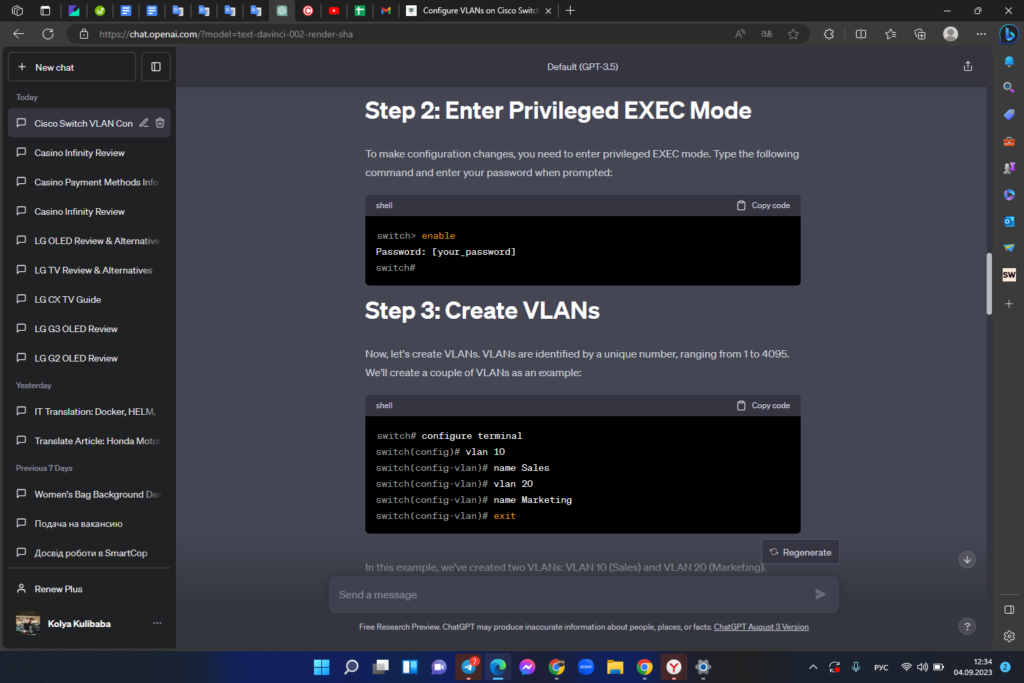
In this example, we’ve created two VLANs: VLAN 10 (Sales) and VLAN 20 (Marketing).
Step 4: Assign VLANs to Switch Ports
After creating VLANs, you’ll want to assign them to specific switch ports. This process is known as VLAN port assignment. For instance, to assign VLAN 10 to a specific port:
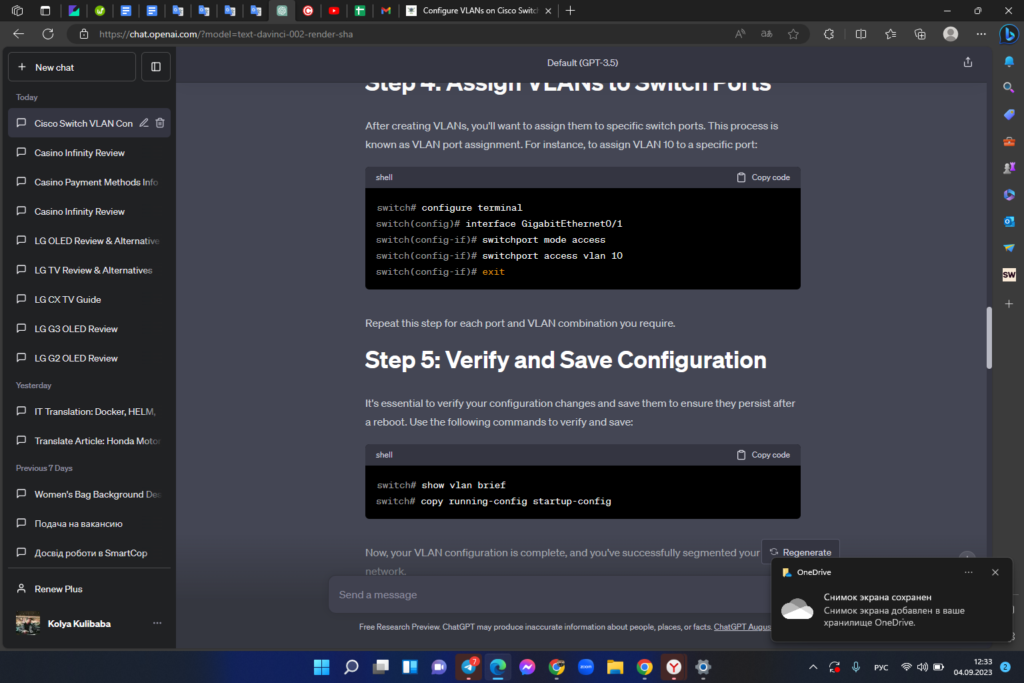
Repeat this step for each port and VLAN combination you require.
Step 5: Verify and Save Configuration
It’s essential to verify your configuration changes and save them to ensure they persist after a reboot. Use the following commands to verify and save:
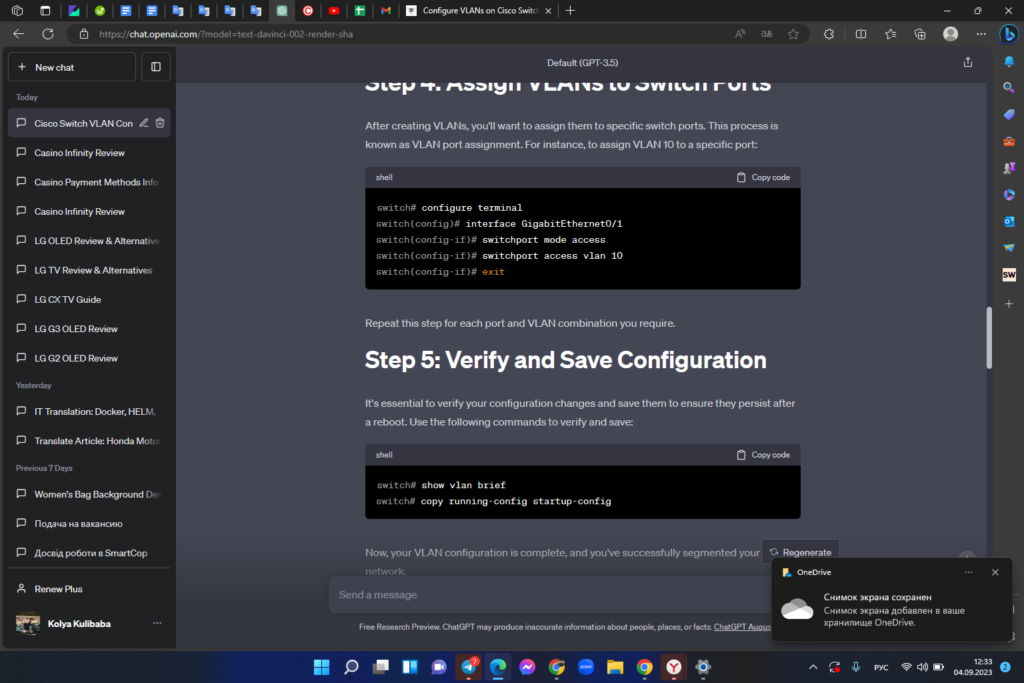
Now, your VLAN configuration is complete, and you’ve successfully segmented your network.
Step 6: Inter-VLAN Routing
To allow communication between VLANs, you’ll need to set up inter-VLAN routing. This enables traffic to flow between different virtual networks. Here’s how you can configure it:
1. Create a VLAN Interface: For each VLAN you want to enable routing for, create a VLAN interface. For VLAN 10 (Sales), it would look like this:
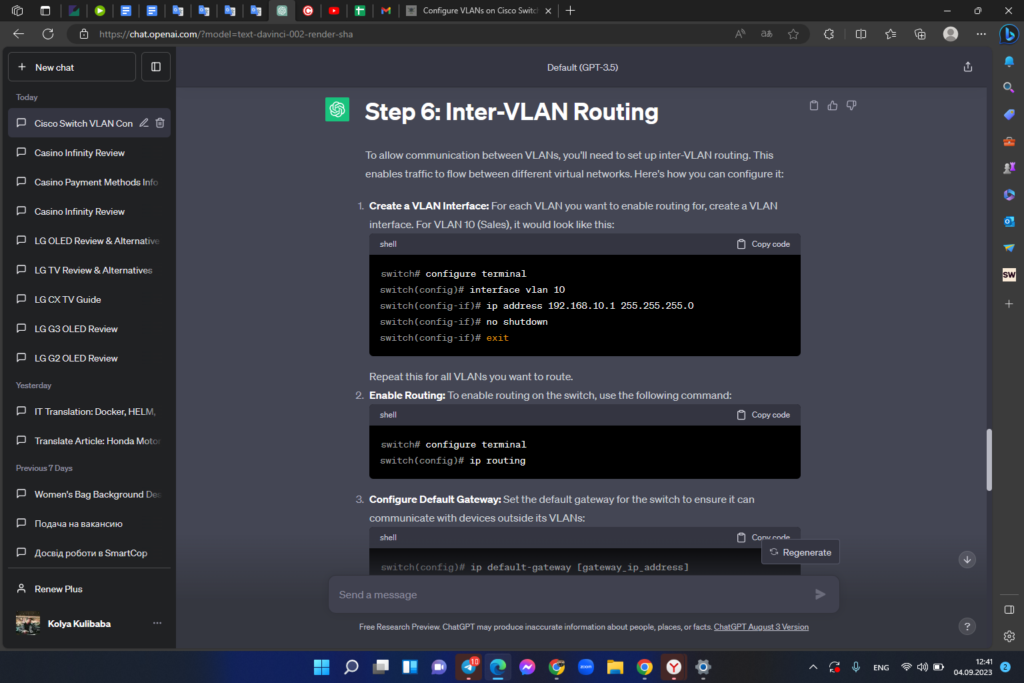
Repeat this for all VLANs you want to route.
2. Enable Routing: To enable routing on the switch, use the following command:
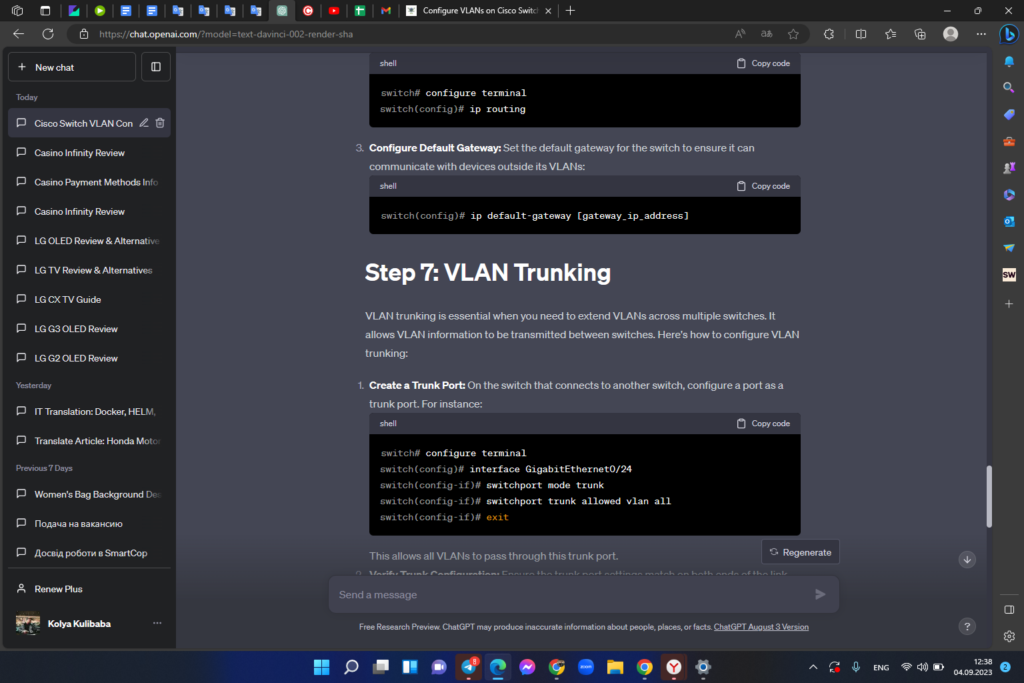
3. Configure Default Gateway: Set the default gateway for the switch to ensure it can communicate with devices outside its VLANs:
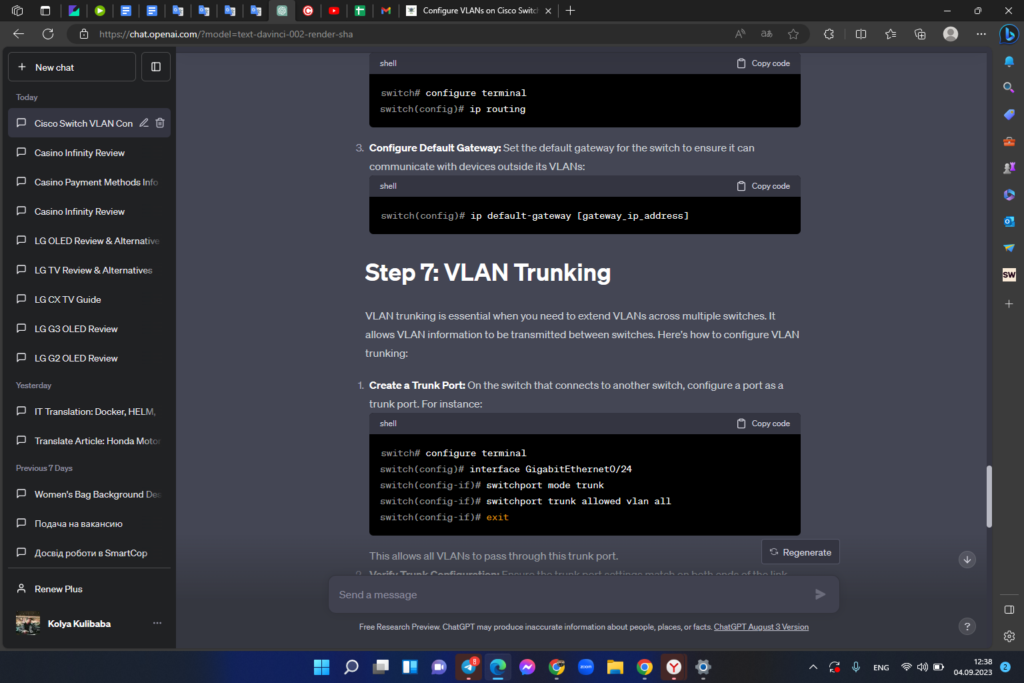
Step 7: VLAN Trunking
VLAN trunking is essential when you need to extend VLANs across multiple switches. It allows VLAN information to be transmitted between switches. Here’s how to configure VLAN trunking:
1. Create a Trunk Port: On the switch that connects to another switch, configure a port as a trunk port. For instance:
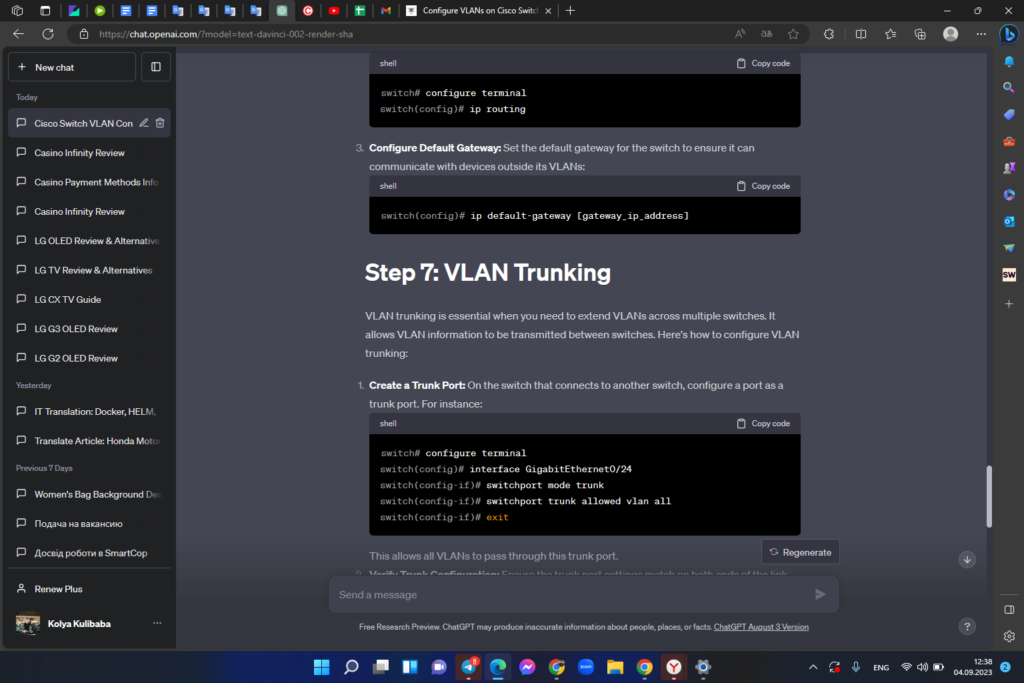
This allows all VLANs to pass through this trunk port.
2. Verify Trunk Configuration: Ensure the trunk port settings match on both ends of the link. Use the show interfaces trunk command to verify trunk port information.
VLAN Best Practices
Now that you have configured VLANs and routing, it’s crucial to follow best practices for VLAN management. Here are some tips:
- Documentation: Maintain detailed documentation of VLAN assignments, IP addresses, and port configurations;
- Security: Implement proper access control lists (ACLs) to control traffic between VLANs and enhance security;
- Monitoring: Regularly monitor VLAN traffic and performance using tools like Cisco’s network monitoring solutions;
- Testing: Before deploying VLAN changes in a production environment, test them in a controlled lab or non-production network.
Troubleshooting VLAN Issues
Despite careful configuration, you may encounter VLAN issues. Here’s how to troubleshoot common problems:
- Check VLAN Configuration: Verify that VLAN configurations match on all switches and interfaces involved;
- Check Trunk Port Settings: Ensure trunk ports are correctly configured and are using the same encapsulation method (e.g., dot1q);
- Inspect VLAN Interfaces: Check the status of VLAN interfaces with the show interfaces vlan [vlan_id] command;
- Review Logs: Examine switch logs for any error messages related to VLANs or interfaces.
VLAN Configuration Summary Table
To recap, here’s a table summarizing the VLAN configuration steps:
| Step | Action |
|---|---|
| 1 | Access the Cisco Switch |
| 2 | Enter Privileged EXEC Mode |
| 3 | Create VLANs |
| 4 | Assign VLANs to Switch Ports |
| 5 | Verify and Save Configuration |
| 6 | Inter-VLAN Routing |
| 7 | VLAN Trunking |
| 8 | VLAN Best Practices |
| 9 | Troubleshooting VLAN Issues |
VLAN Security Considerations
Configuring VLANs is not just about segmentation; it’s also about securing your network. Implementing proper security measures is essential to prevent unauthorized access and potential breaches. Here are some key security considerations:
- Port Security: Use port security features to limit the number of MAC addresses that can access a port. This prevents unauthorized devices from connecting;
- VLAN Access Control Lists (ACLs): Create VLAN ACLs to control the flow of traffic between VLANs. You can define rules to allow or deny specific types of traffic;
- 802.1X Authentication: Implement 802.1X authentication to ensure that only authorized devices can connect to the network. This adds an extra layer of security to your VLANs;
- VLAN Hopping Prevention: Protect against VLAN hopping attacks by disabling unused ports and using features like Dynamic Trunking Protocol (DTP) security;
- Regular Auditing: Periodically audit your VLAN configurations to identify and rectify any security vulnerabilities or misconfigurations.
Scaling VLANs and Advanced Configurations
As your network grows, you may need to scale your VLAN configurations and implement advanced features. Here are some considerations for larger and more complex network environments:
- Private VLANs (PVLANs): Implement PVLANs to further isolate devices within a VLAN. This is useful in scenarios where you need strict segregation;
- VLAN Tagging: In situations where you have multiple switches and VLANs, consider using VLAN tagging (802.1Q) to carry VLAN information between switches;
- Virtual Router Redundancy Protocol (VRRP): Configure VRRP to provide high availability and failover for VLAN routing;
- VLAN Design: Plan your VLAN design carefully, considering factors like broadcast domains, network traffic, and future growth. A well-designed VLAN structure is easier to manage and troubleshoot;
- Monitoring and Reporting: Invest in network monitoring tools that can provide real-time visibility into your VLAN performance and alert you to any issues;
- Segmentation by Function: Consider segmenting your VLANs not only by department but also by function. For example, separate voice and data traffic for better QoS (Quality of Service) management.
Conclusion
Configuring VLANs on Cisco switches is a fundamental skill that enhances network security and management. By following this step-by-step guide, you’ve learned how to create and assign VLANs, making your network more efficient and secure.
FAQs
VLANs are used to segment a network into smaller, isolated virtual networks, enhancing security and network management.
Yes, you can change VLAN assignments dynamically without disrupting network connectivity.
Cisco switches support up to 4095 VLANs.
Older Cisco switch models may have limitations on the number of VLANs or other features. Check the documentation for your specific model.
Use the show vlan and show interfaces commands to troubleshoot VLAN issues. Additionally, reviewing the switch logs can provide valuable insights.
