When delving into the realm of networking and remote access, the stalwart technology known as Telnet emerges as a timeless cornerstone. Acting as a protocol of connectivity, Telnet bestows upon users the power to establish distant liaisons and wield dominion over networked devices. Despite its historical origins, Telnet’s relevance persists in select scenarios, owing to its inherent simplicity and modest demands on resources. Within this guide, we shall plunge headlong into the intricacies that encompass Telnet configuration, proceeding step by step, thereby empowering you to adeptly harness the full spectrum of its capabilities.
Understanding Telnet
Telnet, an abbreviation for “telecommunication network,” functions as a protocol that facilitates text-based correspondence between devices across a network. It operates within a client-server framework, wherein a user situated on a local device (the client) initiates a connection with a remote device (the server) through employment of a Telnet client application. Following the establishment of this connection, the user gains the capability to interact with the remote device in a manner reminiscent of a direct connection.
Amidst the contemporary landscape predominantly characterized by the dominance of SSH (Secure Shell), a secure protocol offering encrypted communication, one might question the rationale behind the continued usage of Telnet. While SSH is favored for security considerations, Telnet retains its value within specific scenarios:
- Legacy Systems: Older devices and systems might only support Telnet for remote management;
- Resource-Efficient: Telnet is lightweight and doesn’t require as much processing power as SSH, making it suitable for low-resource devices;
- Quick Troubleshooting: In some cases, Telnet can provide a fast way to diagnose network connectivity and application issues.
Telnet Configuration Steps
Before diving into Telnet configuration, it’s important to note that due to its lack of encryption, Telnet should not be used for transmitting sensitive information. If security is a concern, consider using SSH instead. With that in mind, let’s proceed with the configuration process.
Step 1: Verify Telnet Installation
Before configuring Telnet, ensure that it is installed on both the client and server devices. Most modern operating systems have Telnet client and server components, but you might need to install them manually.
Step 2: Enable Telnet Server
- Windows: On Windows, open the “Control Panel,” navigate to “Programs,” and select “Turn Windows features on or off.” Check the “Telnet Server” option and save changes;
- Linux: On Linux, you might need to install a Telnet server package (e.g., telnetd on Ubuntu). Use your package manager to install it.
Step 3: Configure Telnet Access
After enabling the Telnet server, you can control which users can access it. This step might differ based on the operating system you’re using.
- Windows: Access the “Control Panel,” go to “Administrative Tools,” and select “Local Security Policy.” Navigate to “Local Policies” > “User Rights Assignment,” and add users or groups to “Allow log on through Terminal Services.”;
- Linux: Edit the /etc/securetty file to specify the terminals that are allowed to run Telnet. Add the appropriate terminal entries for your system.
Step 4: Restart Telnet Service
After making configuration changes, restart the Telnet service on the server to apply the settings.
- Windows: Use the Services application to restart the “Telnet” service;
- Linux: Use the following command: sudo systemctl restart telnetd.
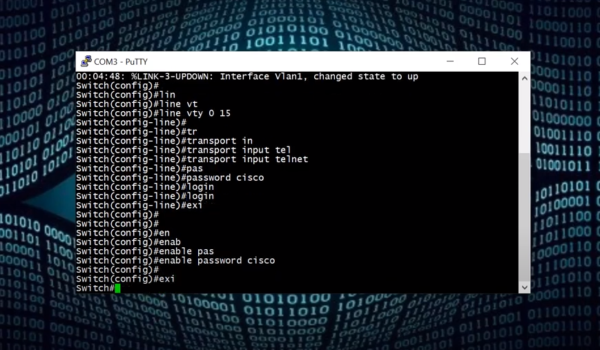
Step 5: Connect via Telnet Client
- Open a command prompt or terminal on the client device;
- Use the command telnet <server_ip> to establish a Telnet connection with the server.
Common Configuration Options

Telnet configuration offers several options to customize the user experience and improve security. Here are some common configuration settings:
- Banner Message: Display a message when users connect to the Telnet server. This can be used for informational or warning purposes;
- Timeout Settings: Configure the idle timeout for Telnet sessions to automatically disconnect inactive users;
- Port Number: Telnet typically uses port 23, but you can change this to another available port for security reasons.
Conclusion
Telnet, despite its limitations, maintains its relevance within specific environments where its simplicity and minimal resource usage offer distinct advantages. Gaining a comprehensive grasp of the correct Telnet configuration procedures can enable you to harness its capabilities optimally, all while maintaining a vigilant focus on security concerns. It’s important to bear in mind, however, that when aiming for a secure and encrypted approach to remote access, the SSH protocol comes highly recommended. For a more thorough understanding of the configuration process, consider exploring this video tutorial.
Integrating Telnet into your arsenal of networking tools can present a versatile remedy for remote access, system administration, and resolving issues. Nonetheless, it’s vital to strike a harmonious equilibrium between the advantages it offers and the security constraints it carries. Safeguarding data remains paramount, so prioritize data protection without compromise.
FAQ
Telnet transmits data in plaintext, which means it’s not secure for transmitting sensitive information over the network. It’s recommended to use SSH for encrypted communication.
While it’s possible, using Telnet over the internet is not advisable due to its lack of encryption. If you need remote access, consider using SSH or a VPN for added security.
Telnet can be more resource-efficient and suitable for certain legacy systems. However, SSH provides better security through encryption, making it the preferred choice in most scenarios.
Yes, you can change the default Telnet port (23) to enhance security. However, make sure to update both the server and client settings accordingly.
While SSH has largely replaced Telnet due to its security advantages, Telnet is still relevant for specific use cases, such as low-resource devices and quick troubleshooting.